Run React app use NPM, Babel and Webpack 3

React - javascript library, created in Facebook for developing user interface sites and web-app. Current version - React 16, released 26 September 2017. Official documentation - Reactjs.org. About different React 15 with React 16 see in react blog.
Contents
- 1 - Include React
- 1.1 Use CDN
- 1.2 Use NPM
- 2 - Config NPM
- 3 - Webpack 3 config
- 4 - Generate file project
- 5 - Builds for Quick Start
- 5.1 Create React App
- 5.2 React Atlogex quick start
1 - Include React
Have 2 based methods for include React - include scripts library (local/CDN) or builds file projects with help package manager.
1.1 Use CDN
Quick way - include need scripts use CDN.
For developing:
|
1 2 |
<script crossorigin src="https://unpkg.com/react@16/umd/react.development.js"></script> <script crossorigin src="https://unpkg.com/react-dom@16/umd/react-dom.development.js"></script> |
Or minimized version scripts for production:
|
1 2 |
<script crossorigin src="https://unpkg.com/react@16/umd/react.production.min.js"></script> <script crossorigin src="https://unpkg.com/react-dom@16/umd/react-dom.production.min.js"></script> |
1.2 Use NPM
Builds scripts use npm means generated project files increases speed load page web-app and with help implement dependency third-party libraries. For use NPM - need install Node.js (NPM part Node.js), download Node.js.
NPM manual - docs.npmjs.com/getting-started/what-is-npm.
2 - Config NPM
After install Node.js, will be allow NPM. For install package use terminal (first go in directory project), command - "npm i name_package" or use config file - package.json.
NPM commands
- "--save" - record in package.json installed package in block - depandence
- "--save-dev" - record in package.json installed package in block dev-depandence
Short commands:
| Action | Command | Short command |
| Install package | install | i |
| Remove package | uninstall | r |
| Update package | update | up |
| Record in package.json block depandence | --save | -S |
| Record in package.json block dev-depandence | --save-dev | -D |
Sample file config npm - package.json:
|
1 2 3 4 5 6 7 8 9 10 11 12 13 14 15 16 17 18 19 20 21 22 23 24 25 26 27 28 29 30 31 32 33 34 35 36 37 38 |
{ "name": "React-aqs", "version": "0.1.0", "description": "Atlogex React Quich Start", "main": "main.js", "scripts": {}, "repository": { "type": "git", "url": "git+https://github.com/Atlogex/ReactAxQuickstart" }, "keywords": [ "yiireact" ], "author": "Atlogex", "license": "ISC", "bugs": { "url": "https://github.com/Atlogex/ReactAxQuickstart/issues" }, "homepage": "https://github.com/Atlogex/ReactAxQuickstart#readme", "dependencies": { "react": "*", "react-dom": "*" }, "devDependencies": { "autoprefixer-loader": "*", "babel-core": "*", "babel-loader": "*", "babel-preset-env": "*", "babel-preset-stage-0": "*", "babel-preset-react": "*", "css-loader": "*", "file-loader": "*", "json-loader": "*", "style-loader": "*", "url-loader": "*", "webpack": "*" } } |
For builds React.js library you can use npm scripts. But usually use bundler (Webpack, Grunt, Gulp and etc).
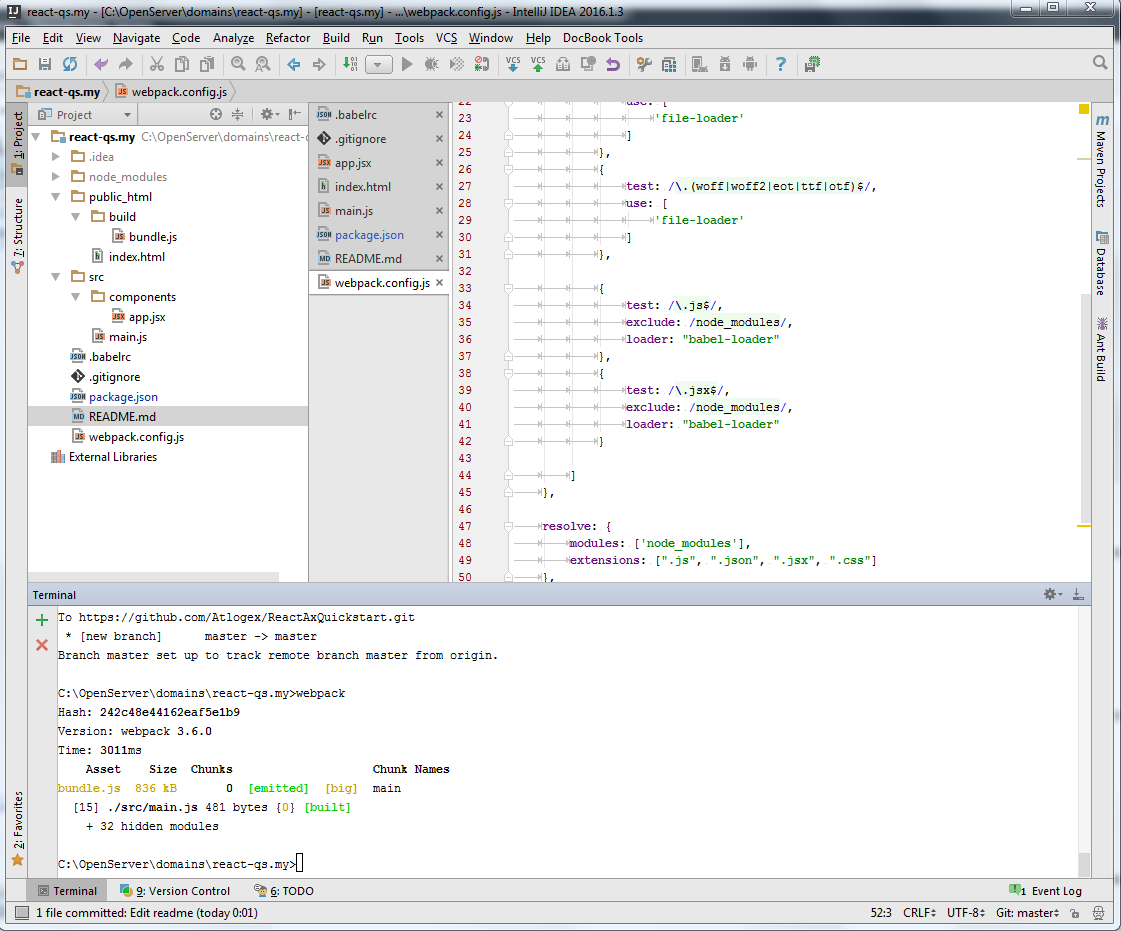
3 - Webpack 3 configure
For configure Webpack use file - webpack.config.js, sample content:
|
1 2 3 4 5 6 7 8 9 10 11 12 13 14 15 16 17 18 19 20 21 22 23 24 25 26 27 28 29 30 31 32 33 34 35 36 37 38 39 40 41 42 43 44 45 46 47 48 49 50 51 52 |
var webpack = require('webpack'); module.exports = { entry: "./src/main.js", output: { path: __dirname + "/public_html/build", publicPath: 'build/', filename: 'bundle.js' }, module: { rules: [ { test: /\.(css)$/, use: [ 'style-loader', 'css-loader' ] }, { test: /\.(png|svg|jpg|gif)$/, use: [ 'file-loader' ] }, { test: /\.(woff|woff2|eot|ttf|otf)$/, use: [ 'file-loader' ] }, { test: /\.js$/, exclude: /node_modules/, loader: "babel-loader" }, { test: /\.jsx$/, exclude: /node_modules/, loader: "babel-loader" } ] }, resolve: { modules: ['node_modules'], extensions: [".js", ".json", ".jsx", ".css"] }, plugins: [], }; |
Sample structure Webpack config:
- Include Webpack;
- Place source file (main.js);
- Place output file (bundle.js);
- Include loaders;
- Include plugin
4 - Generated files projects
For React.js need use babel pressets (if you will be use JS6 or JSX). Configure babel can in package.json or webpack.config or self config file - ".babelrc". Recommended use .babelrc, this helps config babel third-party libraries. Use next pressets for React app:
|
1 2 3 4 5 6 7 |
{ "presets": [ "env", "stage-0", "react" ] } |
For run generated projects files, use command "webpack" in terminal. I usually make it in IDE terminal -
5 - Quick start which helps
For quick start React use Reacts builds.
5.1 Create React App
Official builds from React developers - github. All configuration files ready. You must have NPM for run projects:
|
1 2 3 4 5 |
npm install -g create-react-app create-react-app my-app cd my-app/ npm start |
5.2 React Atlogex - my builds for quick start
Warning - I recommend use official React Quick star - "Create React App". My quick start - github, include React, Babel (preset-env, preset-stage-0), Webpack config and list UI Kit library (Before builds uncommented need UI library).
Command for clone my project:
git clone https://github.com/Atlogex/ReactAxQuickstart.git .
After use NPM build:
npm i
 (No Ratings Yet)